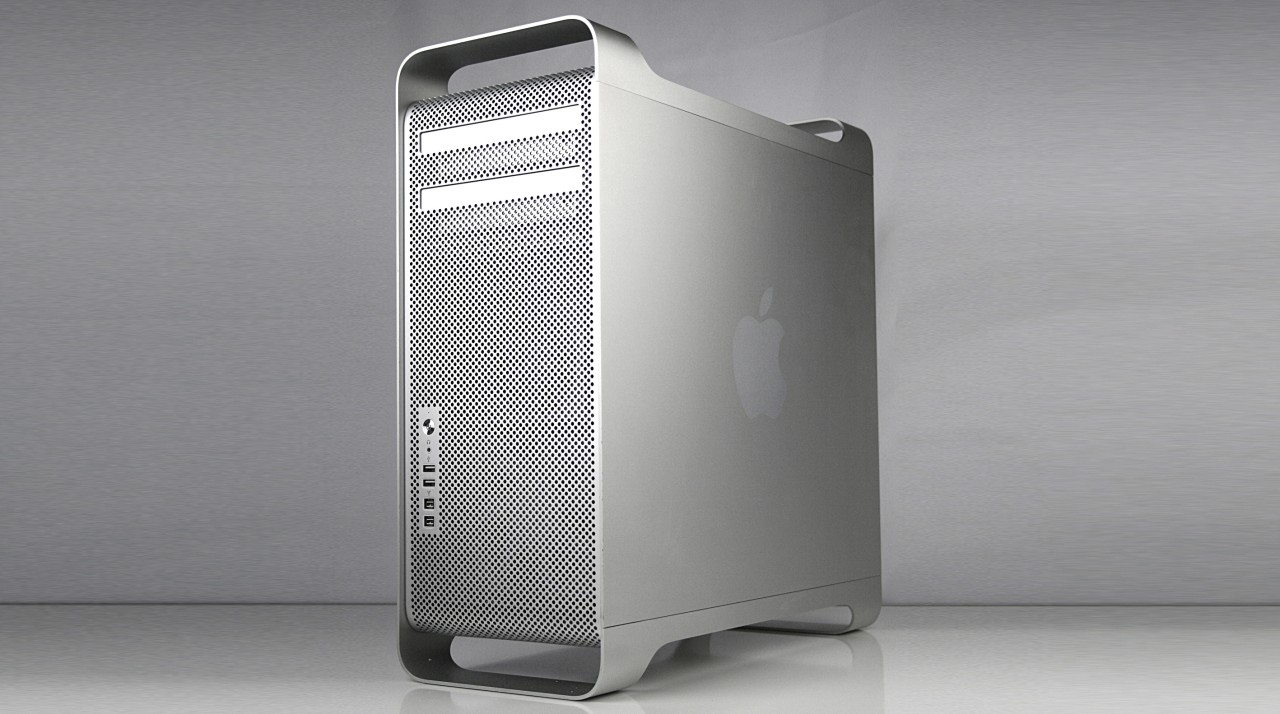
It is winter in Australia – all my flying things are currently having a break more or less. So what I need is a winter project to keep myself busy. I found a broken G5 Mac Pro on eBay would was too cheap to ignore. Got it but was not able to fix it to my disappointment. But the build quality really impressed me and two more (working) G5 Pac Pros (aka Power Macs) followed. They came with some more Apple accessories and one had an additional SSD drive installed. I loved it, but the Power PC platform is dead and the Mac stuck at 10.5.8.
So I kept my eyes open for a Mac Pro 1.1, which would be Intel based. With his two 2.66 Ghz XEON CPUs it still looks good compared to todays i5s. But his limitation is to be stuck at OS 10.7.5. A limitation that can be removed!
The goal of my project was to have a well performing Mac for cheap, that runs the latest OSX version (Yosemite) and should not disappoint in comparison with my 2014 Mac Book Pro Retina. It will replace (sadly) my Linux Desktop, which is also used for 3D printing.
I got lucky again on eBay and was able to buy one in an auction, that only got little attention for AUD $102.50. It had a 500 GB SATA drive, 2 GB RAM and the stock NVIDIA graphics card.
SSD Upgrade
Once I had it here, first thing was to take the 120 GB SSD out of the G5 and install it in the Mac Pro 1.1. Something I thought would be easy, turned out to be rather complicate. The Mac Pro 1.1 comes with 4x 3.5″ drive trays. That makes the installation of 3.5″ drives really easy. But the SSD has a 2.5″ form factor and even with an adapter, the connectors would not line up when its attached to the the tray. There are some 3rd party trays (expensive) you can get or you put it in the optical bay, in the space for the 2nd DVD drive. You need to get some SATA wires from there then connect them directly to the logic board. My solution was doubled sided foam tape. The SSD is feather light and I just plugged it into the SATA connector, looked for a flat space above the SSD drive to just stick it on the top of the drive bay. Just 3 layers of tape, 2cm long and it will just stay in bay #2 without any troubles.
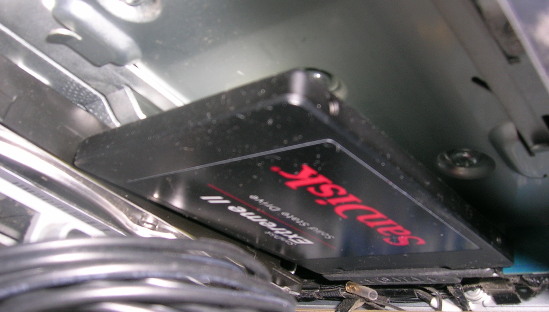
My SSD held in place by foam tape in Slot 2.
Thanks to the Disk Utility from OSX I was able to clone copy the clean 10.7.5 installation the seller has made onto the SSD. For that I had to boot into recovery – something that worked on 10.5 btw from the desktop. Long story short, my Mac Pro boots 10.7.5 in under 5 seconds!
That was a quick win and a cheap one as well. I bought the whole G5 with some software for $50 and cloned the OS from the SSD to the SATA drive it still had. I am sure I can sell it for 80 – 100 bucks. Its a free SSD!
Memory Upgrade
What bothered me was that it just had 2 GB of RAM. It turned out less to be a bottleneck than I thought. But I thought 4 or 8 GB would be a nice to have. As I am sometimes running VMs and I also hate it when a computer starts to swap. The Mac Pros uses server memory, fully buffered , DR2, P5300 and with ECC. This kind of memory gets really hot – thats why it got in these Macs the biggest heatsinks I have ever seen on a RAM module. I found some ‘4 GB Samsung M395T5160QZ4‘ that match the Apple specs but do not have these special heatsinks on them. I took a risk for $31 and again got two of them for that from eBay – shipping included. To my delight, they work in my Mac Pro. I have removed the 4 512MB memory modules but later put one pair back in to compare temperatures. I am now on 9 GB and the two Samsung are around 70C, but the stock ones are just around 44C. I read a lot about it on the web – the modules are OK with it. But installed ‘SMC Fan Control’ to increase fan speed a bit, to maintain temperature better. The original Apple modules with the big heatsinks are a lot more expensive – especially here in Australia. I didn’t want to wait long to get them from overseas and still spend more than necessary.
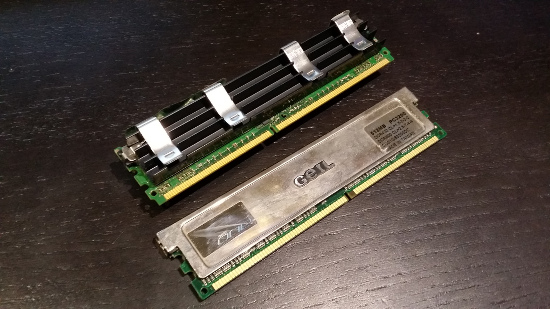
Mac vs Server Memory
So I felt blessed with my Mac. The installation of all necessary tools for 3D printing (Slic3r and Printrun) was a breeze. It is fast and fun to use. The only limitation I noticed was the stock graphics card. I only really noticed that in an adventure game I downloaded, it was unplayable. Also Netflix was not working well in a browser. At the time I did not think that the Netflix issue relates to graphics card, but the upgrade to a more up to date one solved this. I was also aware, that neither Mavericks nor Yosemite have drivers for the old NVIDIA graphics card (Thanks Apple!). So if I want to update, I need something that Yosemite can deal with.
Graphic Card Upgrade
The stumbling stone for the Mac Pro’s 1.1 and 2.1 is their 32 Bit EFI bios. Anything above 10.7.5 requires a 64 bit EFI bios. But for me it is more an Apple strategy to have people retire still well performing machines. Someone wrote a 64 bit wrapper and all it takes is to replace boot.efi from your Yosemite installation with that one. But more about that in another article.
Before I can even think about going the Yosemite route, I need a better and supported graphic card. Again I had luck. Neighbors moved out and dumped some boxes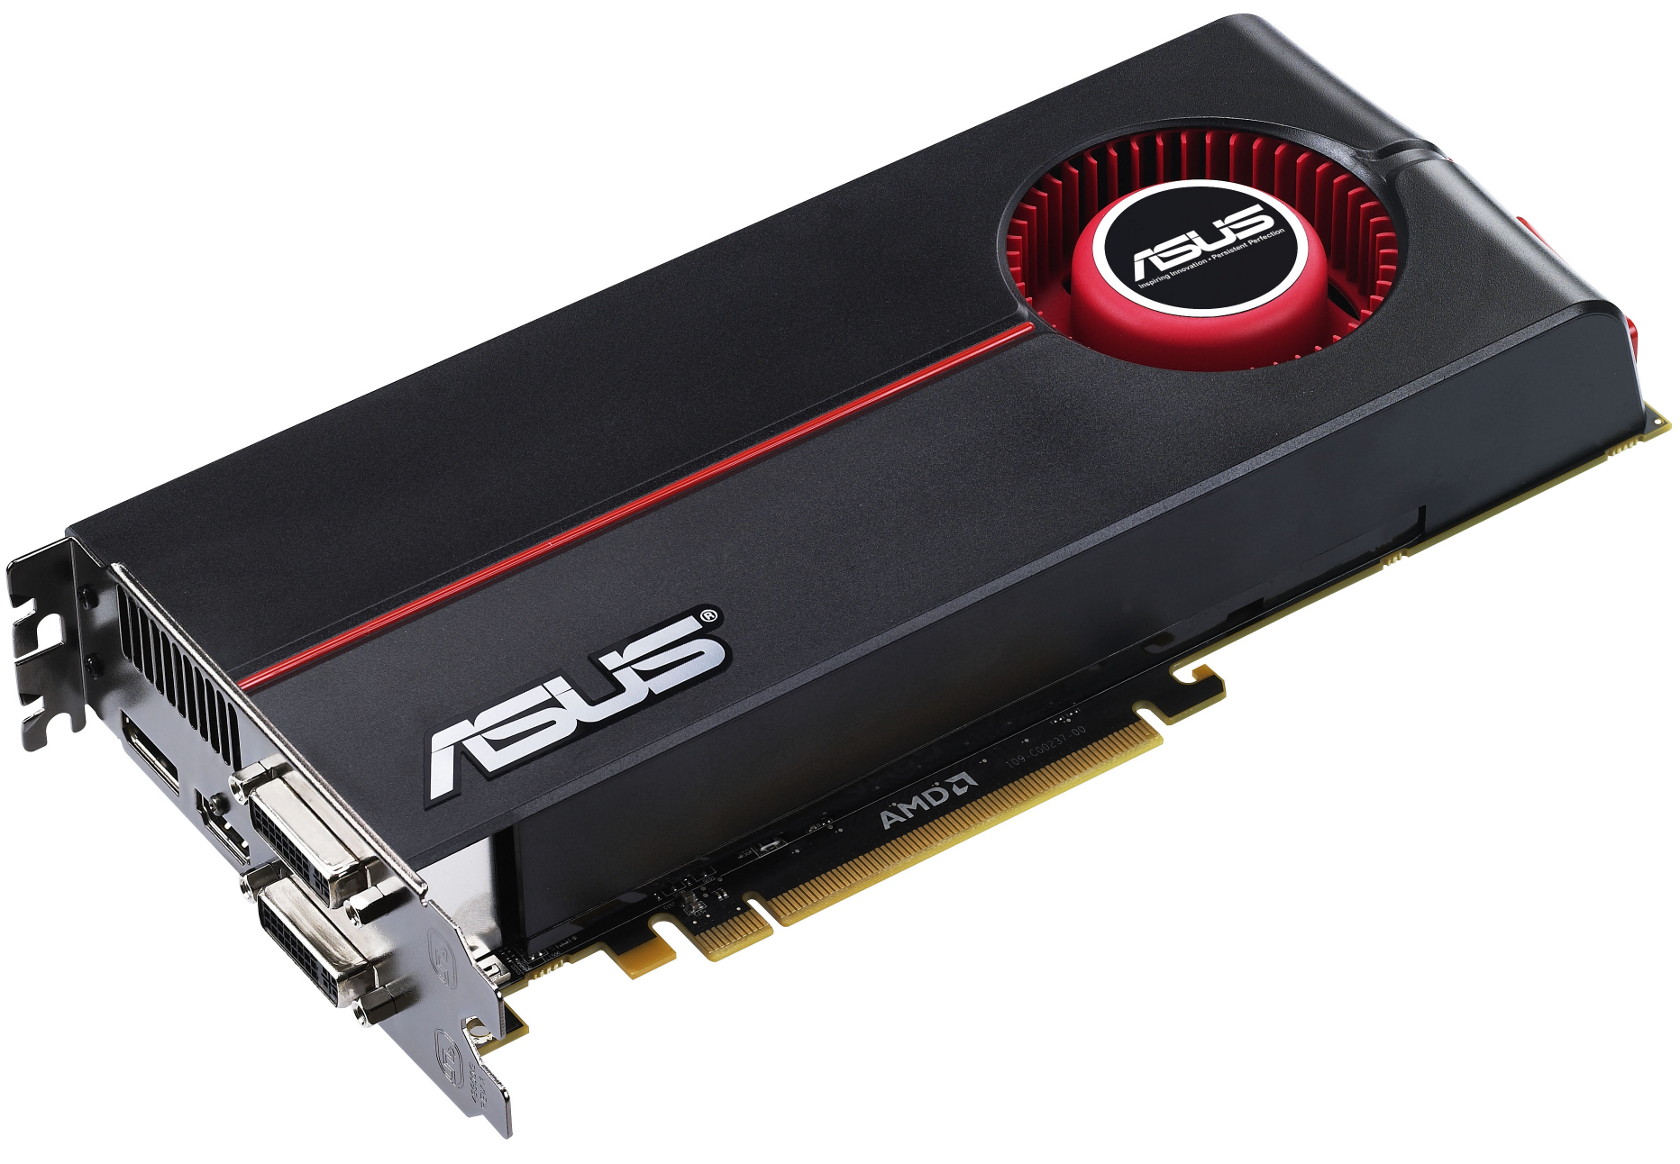 of electronic garbage on the street. That caught my attention and looking into one of these boxes I found besides a bunch of cables an ASUS 5850 PCIe graphic card. It was the biggest card I have ever seen and it needed two additional 6 pin power cables to source it with sufficient juice. It got 1 GB of RAM and seemed to be still a decent card. After doing some research I found that Apple sold ATI 5870 cards as upgrades for Mac Pros. The 5850 and 5870 are almost the same (the latter got more shaders). The problem with the PC graphics card is, that they got a different EFI BIOS issue – they don’t have one. In most cases they work, but you don’t have a boot screen. So no more switching of the boot device bu holding the option key. I like boot screens and did some research. There is a interesting thread here, that explains how to deal with 5870 and other ATI cards related to this issue. A more recent EFI bios with better port mapping is discussed here. You can easily extract the original BIOS and add an EFI portion to it. Then flash it back and voila, you got a boot screen. Well it took quite an amount of testing and flashing on an old PC board with two PCIe slots but my 5850 is recognized as an APPLE 5870 card and performance wise it makes an extreme difference. One issue to solve here as well was the 6 pin cable to source the card with extra power from the Logic Board. Apple had their own set of tiny connectors for that purpose on the board. I found the cable as G5 6 Pin PCIe power cables. For less than $10 I was able to order them from China. The 5850 is sold on eBay around $80, the 5870 is more expensive and you can find them flashed and ready for your Mac for $280 – $300. So you can save > $200, if you just flash it yourself.
Now I am well prepared for the update to Yosemite and will write in another article about it. The overall costs for my Mac Pro were below AUD $150!
Pingback: Yosemite and the MacPro 1.1 / 2.1 ← Lincade.org
Thanks for the page. The only info I could find that said ‘don’t boot from usb’s at the front’- good tip. I’m having hell’s own game trying to get this to happen, have followed several ‘easy install’ tutes using sfott – it gets half way through building the usb and then aborts. Do you have any links to an ‘idiot proof’ version of the install? system: MacPro 1,1 2×2.6 Ghz Xeon/ 7Gb RAM/ GeForce GT120 512/ Lion 10.7.5(11G63). With thanks, David.
Hi David, I also had issues with other tutorials having the thumb drive creation failing. An even simpler option might be to use this ready made image referenced here:
http://forums.macrumors.com/threads/2006-2007-mac-pro-1-1-2-1-and-os-x-yosemite.1740775/page-88#post-20537556
You can restore it via Disk Utility to the thumb drive. I tried that in the first place and my Mac did not like the image. But others had success. Using a different thumb drive might also be worth trying! You can borrow mine if you live around Sydney.