I thought I need to get a little project for my long end of the year break. So I went even to the extreme and ended up with something micro sized.
But first a little big background story. I came across the ‘CJMCU’ board, which is a frame and a flight controller at the same time. According to rumors these boards were created for a mysterious project nobody knows anything about. It got a STM32 on board so the boys from Cleanflight couldn’t hold back long and ported their awesome software on it. The makes it the smallest thing I am aware of that would run Cleanflight. There is only one place at the moment, who sells these board- Goodluckbuy. With only $19 they are cheap. So I ended up ordering one from them and other bits and pieces from at the end 3 different places:
- CJMCU Board (FC + frame) – $18.89
- 2 Packs of Hubsan Brushed Motors – $9
- Mini Propellers – $1.5
- VD5M Radio Receiver – $11
To be ready for FPV I bought a tiny camera from Banggood as well:
 My plan is to use a $20 VTX from Hobbyking with 200mw, but the problem is that it needs at least 6V. The micro quad will run on a single LiPo cell, so 4.2v is all I got. To sort this problem I plan to use a tiny setp up converter from Polulu. Luckily I found a source here in Australia:
Polulu U3V12F9 – $AUD 5.53
The shipping cost for this tiny thing would have been > $26 if I had it ordered from Polulu directly. I placed my orders on the 21st of December and all arrived already in the 2nd January week. Still a week of leave to go, so I started to put the thing together.
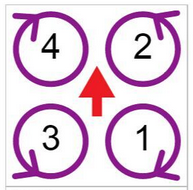
The good thing is you just have to install the motors and connect the receiver. The motors come in two flavors. One spins clockwise and the other one in the opposite direction. You can distinguish both by the different wire colors (Red/Blue = Clockwise, Black/White = Counter Clockwise). The arms are numbered, but they don’t match with the ones in CleanFlight. So to determine which one goes where, look at the graphic below. The motors are sold in a pack of two, both spinning in different directions.
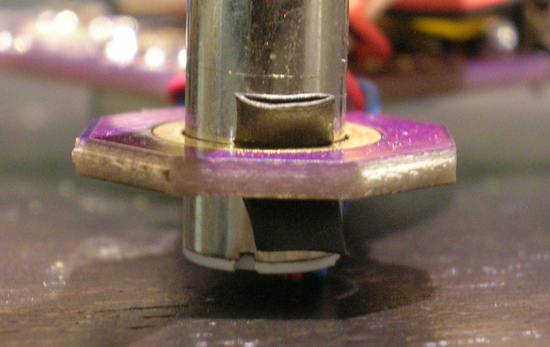
Mounting the motors is a bit tricky, to hold them in the arm I tried first to solder them. But I wasnt pleased with the result and gave up. A better way of doing it is to stick a small piece of shrinking tube through the hole in the arm and then to squeeze the motor in. It holds quite well!
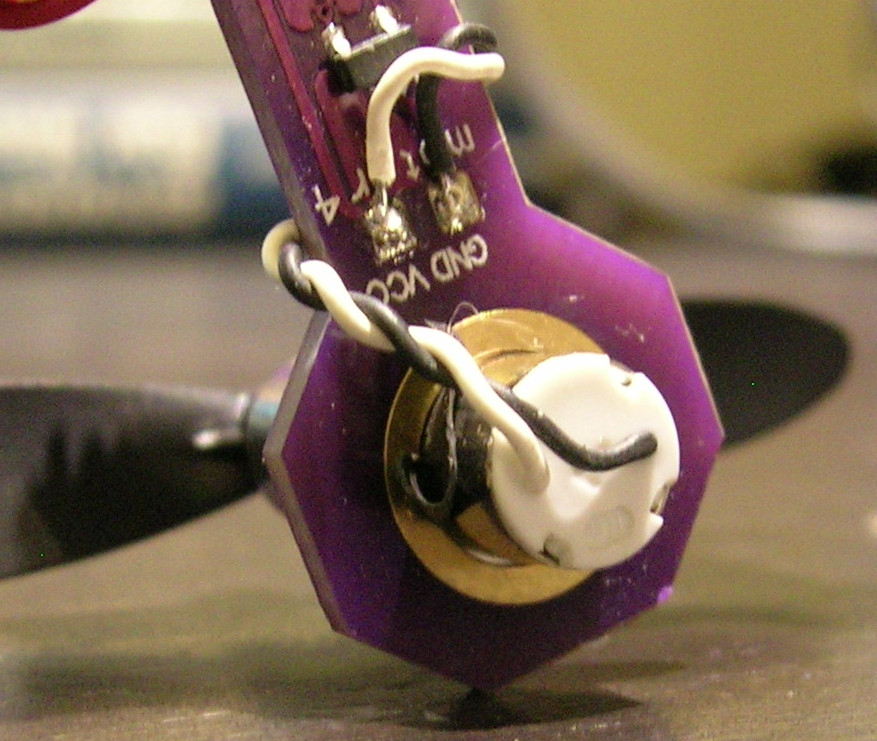 Another thing worth mentioning is not to cut the wire super short to save weight, if you plan to go for FPV. Twist them like I did and wrap them around the arm – that helps to avoid noise!
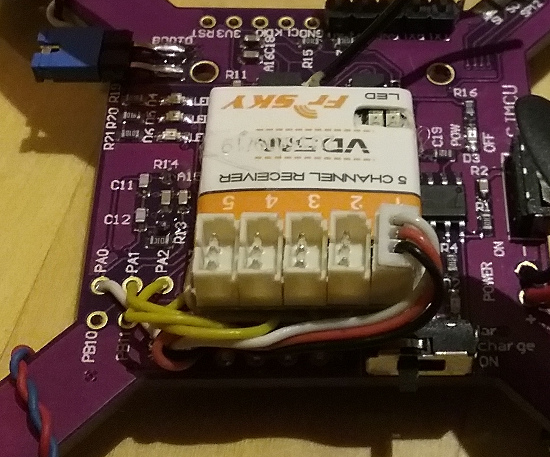
What turned out to be a big challenge was the receiver. The VD5M comes with one connection cable with two micro JST plugs and a set of micro JST plugs you have to crimp on a wire yourself. These are really really tine and I was only able to attach them through a big magnifying glass. That took me about an hour for 3 wires for the remaining channels where I had no ready made cable for. My wish was to keep it modular and also to keep the wrapping around the RX so that I don’t need to worry about random shorts. But this plan did not pan out well. The crimped connections turned out to be unreliable and came off on the first crash. So I removed the over JST connectors and soldered the wires directly on the RX board. A lot better and I managed to keep the wrapping (~ paper case) of it.
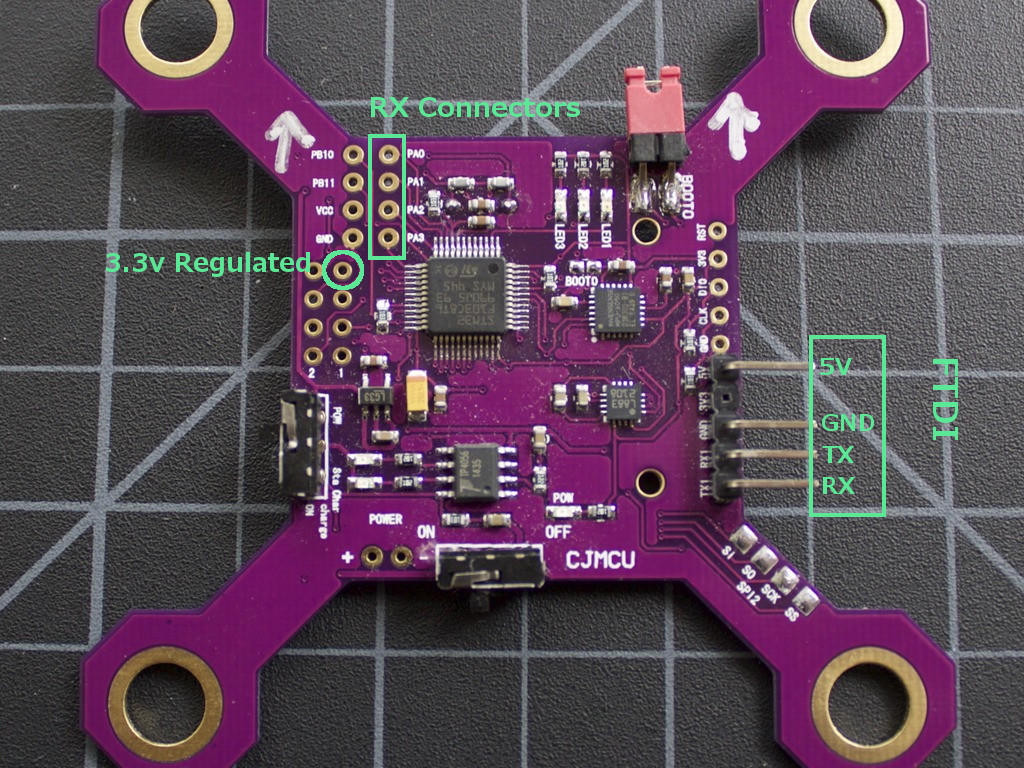 The board connectors for the receiver are:
PA0 = Channel 1
PA1 = Channel 2
PA2 = Channel 3
PA3 = Channel 4
Also make sure not to use the ‘VCC’ connector on the board below ‘PB11’ for your RX. It is not regulated and you might end up with some brown outs! Rather go for the regulated 3.3v output, the VD5M does not need 5V and stable 3.3v are guaranteed here. It is of course fine to use the ‘GND’ connector right below it.
Flashing the board is easy. It does not come with a USB plug like a ‘real’ Naze32. You need to use a FTDI adapter and connect it as illustrated in the graphic above. No need for a battery connected at this stage. The FTDI can power the board. To get the CJMCU into ‘flashing mode’ you need to pull the ‘Boot0’ jumper (there is just one) from the board.
In Cleanflight Configurator on your computer switch to the flashing tool and select the CJMCU Firmware. Just ‘load it from online’ and flash it. After that you can configure it just like any other Naze32 flight controller.
To be continued…
I’ve been flying the same micro around the house. We went for lowest possible weight, so we stripped the paper and connector off the VD5M. I would like to activate the 5th channel to switch flight modes but I don’t know where channel 5 would attach to the FC. I just noticed that I have 2 grounds attaching from the FTDI and you are using just 1. I’ll try that and if it works, I’ll desolder that header pin for even less weight. We are finding that h107l props from BG come in two sizes and it’s roll of the dice which ones arrive. The 55mm props wont lift the bird, but the 58mm props do.