Faulty Parts
We are now at the final part with the ESCs. After that they are ready to be mounted on the arms, with some double sided tape and wire straps. Before I do any changes to the ESC I check all of them. So I connect one by one to the powert distribution port, a motor and a receiver of course. When I am able to operate the connected motor as expected, I am satisfied and the ESC can be flashed. With one of the tested ESCs, I will also go to check each of the motors.
It turned out that one motor had a problem. I most probably caused that, by pulling on one of the three cables. One of the tiny wires soldered to each of the three cables broke probably. Thats why it is stuttering, a connection to one of the magnets is missing. I was not able to find the lose connection so I had no other choice and order a new motor. At Hobbyking this motor was sold out already (of course). No way I use a different motor on one of the arms, but I had luck that one of the local hobby stores had stock. So I was able to mailorder a spare one from there. Supposed to arrive by tomorrow.
When I checked the ESCs for operation, I had another motor stuttering and thought that one more just broke – without any good reason. But a different motor connected to the same ESC displayed the same problem. It was the ESC which is faulty. I got one used “spare” ESC of the same type. It gave me before some confusion after flashing it. But I checked it and it is allright!
Simonizing the ESCs
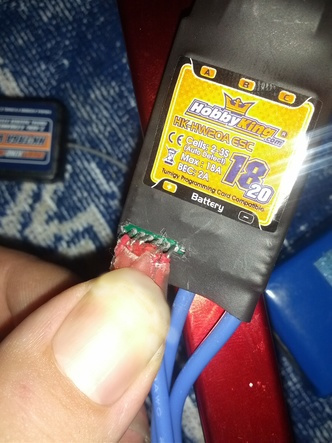
I went on to flash the remaining three working ESCs, my spare was already with the Simon K firmware. In case you consider flashing your ESC with a new firmware, I would first visit this overview. It lists many different types of ESCs and the firmwares from Simon K which work on them. My ESC is called “HK-SS20A-HW” and the table tell me that “tgy.hex” is the correct firmware. There is also a link and some additional information on the programming pads is provided as well. You will also need an AVR flasher, which could also be purchased at Hobbyking here. The “USB ASP” they are selling is the same type I am using and its really cheap.
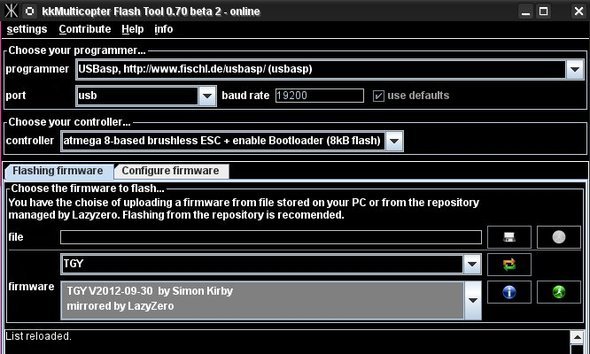
We are lucky that LazyZero extended his excellent “KKMultiCopterFlashTool” with ESC flashing functionality. The tool was build to ease the process of flashing all the different types of the KK Board Flight Controller. First you have to chose your programmer and then the type of hardware you want to flash. In our case its not a KK Board, but a ESC. The tools fetches automatically all the latest firmwares. We just have to specifiy the type of ESC firmware. In our case it is “TGY”, as indicated earlier in the table from the website. Now we can choose between two different firmware files. The only difference between both of them, is that one lets the motor operate in the one or the other directio. (hence normal/revers). There is no programming with your transmitter of the Simon K firmwares possible, as you might be used to. The only thing we can and have to setup after flashing, is the zero position of the throttle stick. So when you need your motor to operate in the other direction, you flash the other firmware. But I am just usually switching two wires at the motor and the result is the same. All 4 ESC will get the same software.
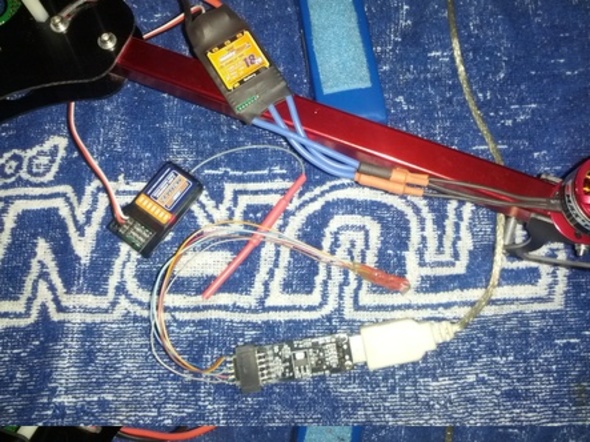
We are ready to flash on the computer. To be able to flash the ESC, I am connecting it into its “natural environment”. In other words I hook it up to the quadcopter like it would be in operation already. It is helpful to have the motor connected, otherwise we wouldn’t hear any beeps. The connection to the power distribution is mandatory, as we need power. I also connect it to the throttle channel of a receiver, to be able make the final check after flashing.
The battery is plugged in and the ESC got power. Now its time to make the connection to the programming pads with the AVR programmer.
My little adapter comes handy here. I press it quite hard to have a good connection and hit the green button in the KKMulticopter Flashtool. In the status window you will see the progress of the different steps (erasing/flashing/verifying). It takes about 20 seconds.
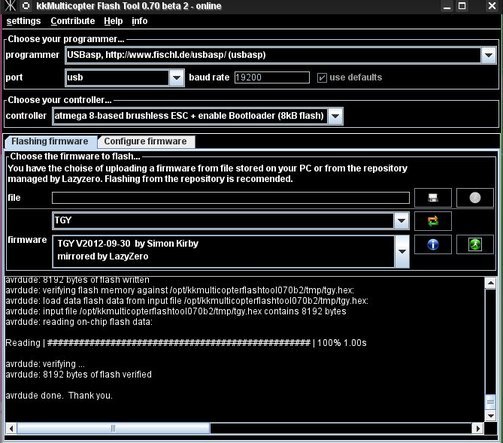
Here you can see the end of progress. The verify was successfull and the ESC should be ready to go. I usually do the check immediately after flashing. For that I unplug the battery on the quad, put my throttle stick to maximum. Connect the battery and after the beep, I lower the stick to minimum. What follows are a few confirming beeps. Throttle is calibrated now. When you raise the throttle stick, your motor should start.
I am also attaching the full logfile of a successfull flash. Might me helpful for troubleshooting.
After repeating the process for 4 times, all our ESCs are done. Time to mount them on the frame and get the flight controller ready, we are now only 2 hours away from the first test flight.


